
I did it! I FINALLY sat down and figured out HOW to make the best, no fail, printed, vinyl laminated, easy peel, kiss cut stickers. And I am going to share exactly what worked for me as I made my kiddos Valentines this year.
Let’s start by grabbing all the tools we will need. I will link to items, some of which were purchased on Amazon, of which I am an associate, so if you follow my link and purchase I do get a small percentage of the sale (at no cost to you).
SUPPLIES:
- Silhouette Cameo 3
- Silhouette Pixscan mat
- Printable Vinly Sticker Paper
- Holographic Waterproof Sticker Sheets
- Paint Shield (I got this one at Dollar Tree for $1.25)
- Adhesive Backed Felt
- Design Studio – Business Edition
- Epson Eco Tank 2800 Wireless Color Printer
Now that we have all the physical supplies/software let’s talk design files. For this project I used the Kawaii Food Sticker file from Silhouette Design Studio. I liked that most of the guess work was done here. The file was easy to work with and had a nice white “sticker border” all the way around it.
Getting your print (and ultimately cut) file ready.
Let me start by saying I think I am done with “print and cut”. I know, I know. I have espoused the ease of use of Silhouette’s “Print and Cut” for a few years now…specifically HERE and HERE. But I started to have MANY issues with it. First off I didn’t like how much space was wasted since I was limited to printing on an 8.5in X 11in paper and the registration marks HAD to be on the page taking up valuable graphic printing space. Additionally if the print wasn’t absolutely perfect the registration marks simply would not register, rendering the project stopped in its tracks. I finally got out my Silhouette Pixscan mat for some serious use last Valentines Day to make some super cute Harry Potter Bookmarks. Those were laminated and I needed to use the Pixscan mat to be able to cut out around the book marks. Ever since then I’ve defaulted to my trusty Pixscan mat whenever I have something I need to be custom printed and cut. An additional plus is that when you use holographic vinyl and the Pixscan mat you don’t have to cut out the vinyl to accommodate the registration marks.

I set up my file for my Cameo 3. Paper size is letter, 8.5 x 11 and I do turn on “Show Print Border” to make sure my graphics are in the “safe printing zone”. I also know that I could change my print and cut margins to gain a little more space but that also often ends up in things not registering correctly.

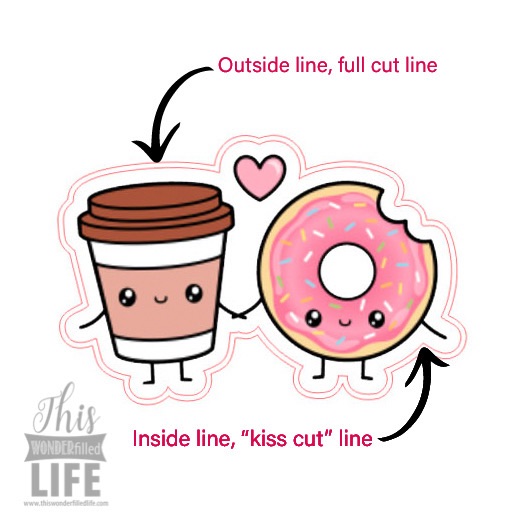
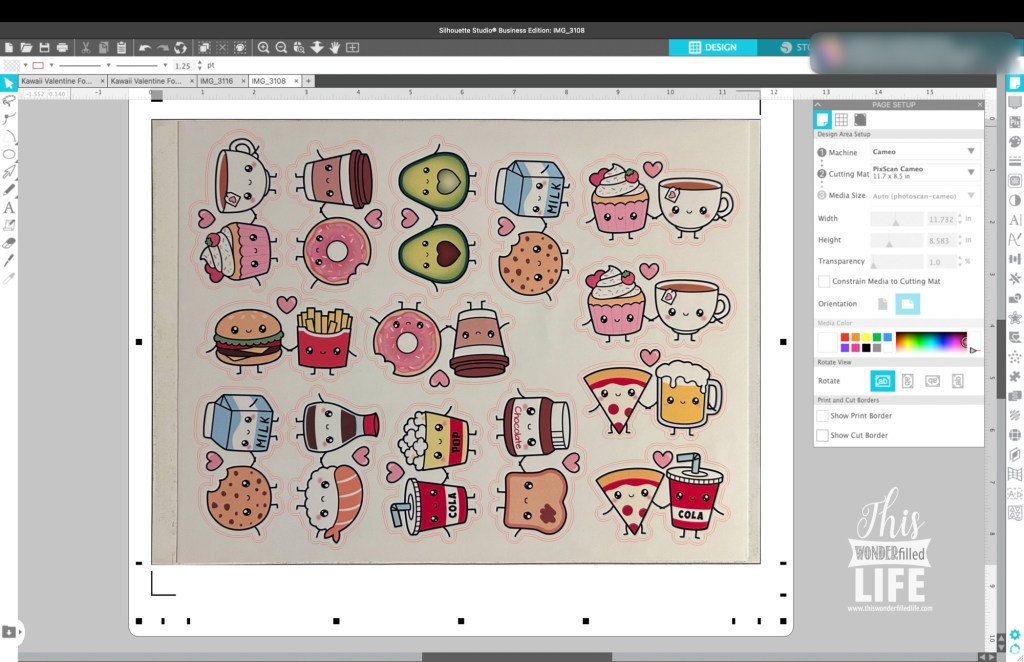
Next take your graphic file and you want to make sure that you change the outline of your image to red (or some other obvious color that is easy to see). With the graphic selected use the offset (star tool icon) to create an outside offset. Also make sure the offset is outlined in a color, fill is transparent and the stroke for both colored outline lines is set to zero (this way the outline will NOT print).

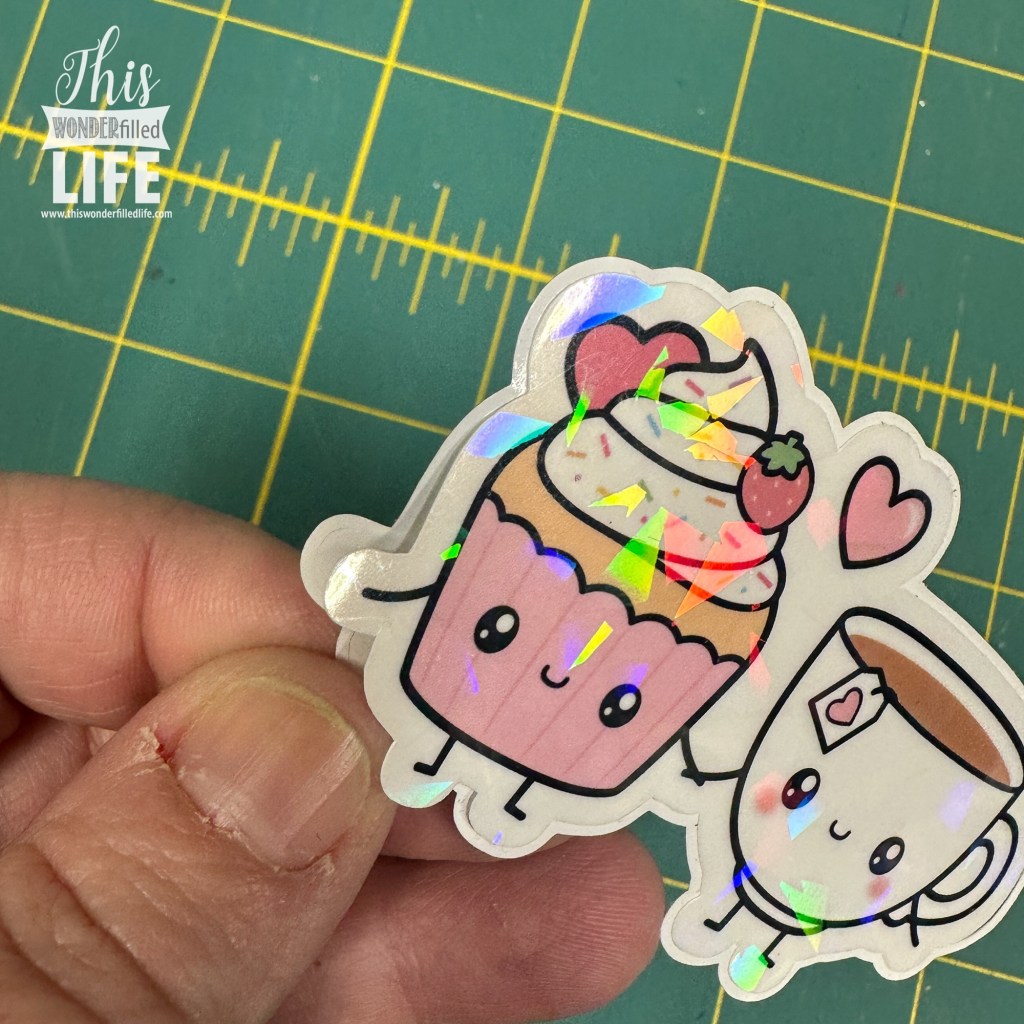
Your final images should have two lines, the first one inside is the edge of your image and will be the edge of your sticker. The inside or “kiss cut” line will only cut through the top layers of the sticker but will leave the paper backing intact. The outside cut line will cut through all the layers of paper. Creating this double cut line is how we get the “easy peel” part of this project. We will eventually weed out that small outline of sticker, leaving us with a slight overhang of the backing, making these stickers the easiest ever to peel! Having made stickers all last year I was constantly frustrated by having to peel the backing off…if we were going to be passing out stickers for Valentines this year, especially to a bunch of second graders I wanted it to be as easy as possible.
Once you have your images outlined you can group them together to drag and add them to your page for printing. You’ll want to make sure that they are all within your print border. Once you have your page all set and filled to your liking you are ready to print!
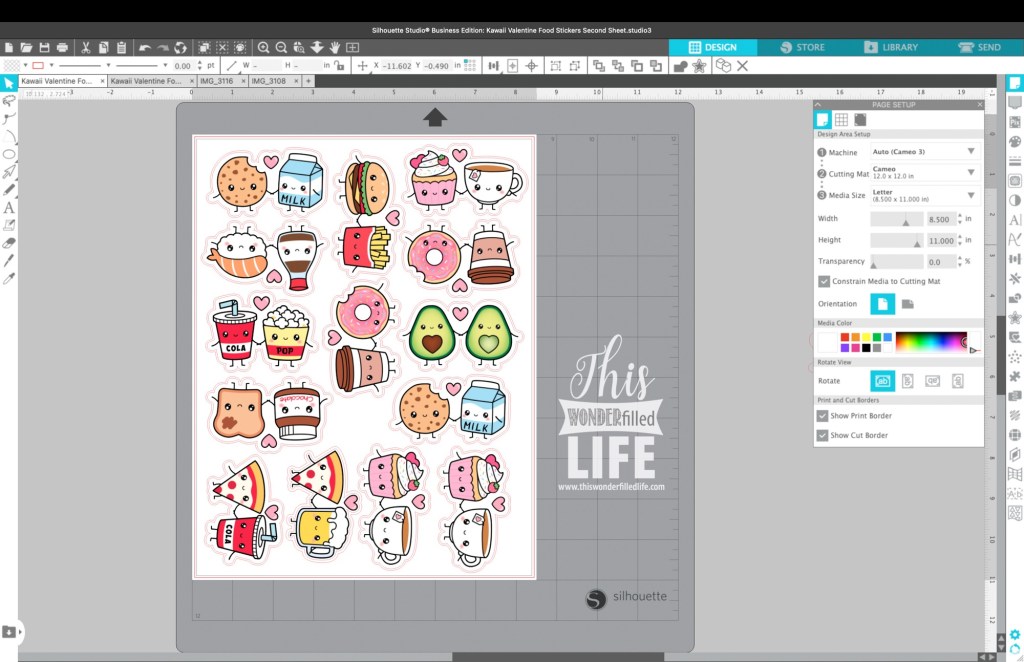
I print directly from the Design Studio app. You can click the printer icon in the tool bar to access the printer from Design Studio. Double check your printer and paper settings. The sticker paper I used is high gloss so I make sure to select the appropriate paper finish from the printer settings panel that pops up once you click print.
Now that we have our sticker sheet printed we can take it to the Pixscan mat and get to adding the holographic laminate and cutting out our stickers!
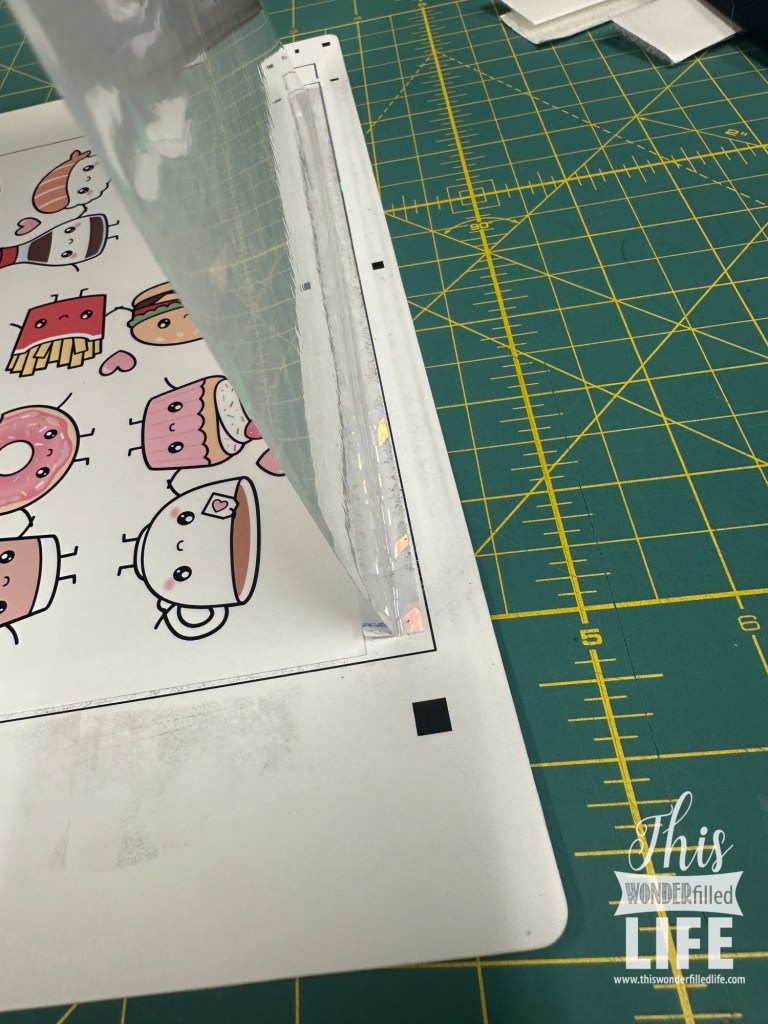
The next steps have been such a source of frustration for me, but I really have found a foolproof way to add the holographic vinyl to my sticker sheets and to cut them so they are easy to peel! I apply the sticker sheets to my Pixscan mat and take my picture BEFORE I add the holographic laminate. This is such an important step because the holographic laminate can make the graphic hard to see when you are trying to line up the cut lines with the printed graphic.

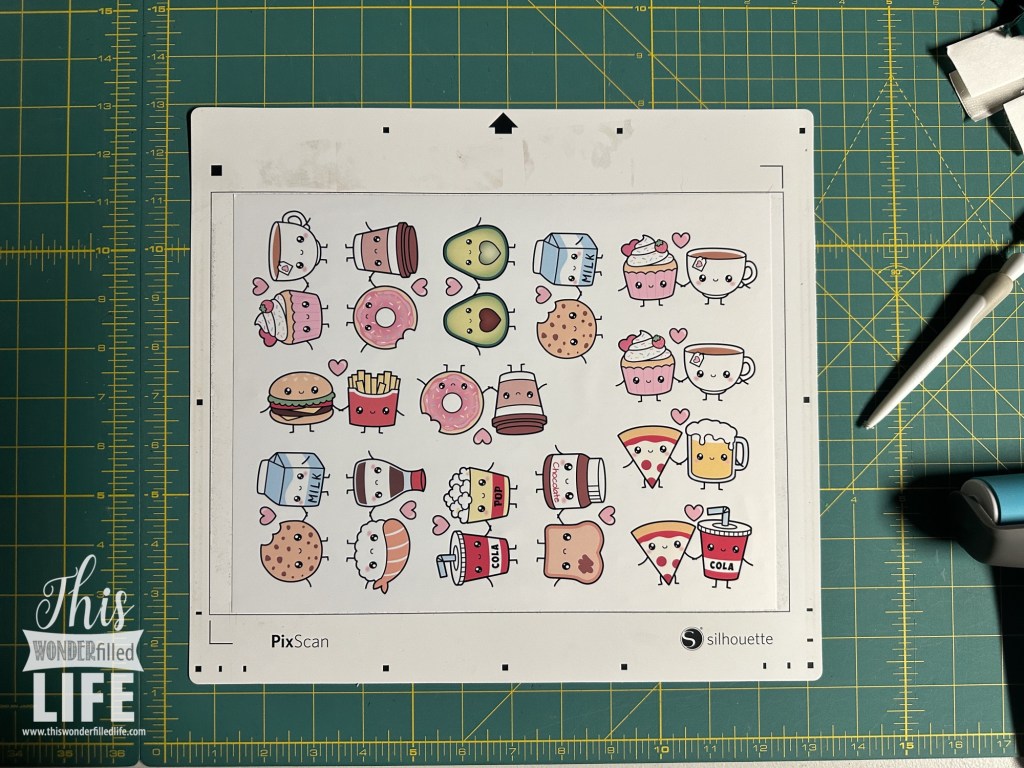
After you take your photo send it to your computer and import it into Design Studio via the Pixscan tool right away. You want to double check that it has imported okay and is usable. I forgot to do it once and that is actually why I have the first photo…I had to retake one after I had applied the laminate. So save yourself some time and hassle and just take the picture and upload it before moving on to the next step.
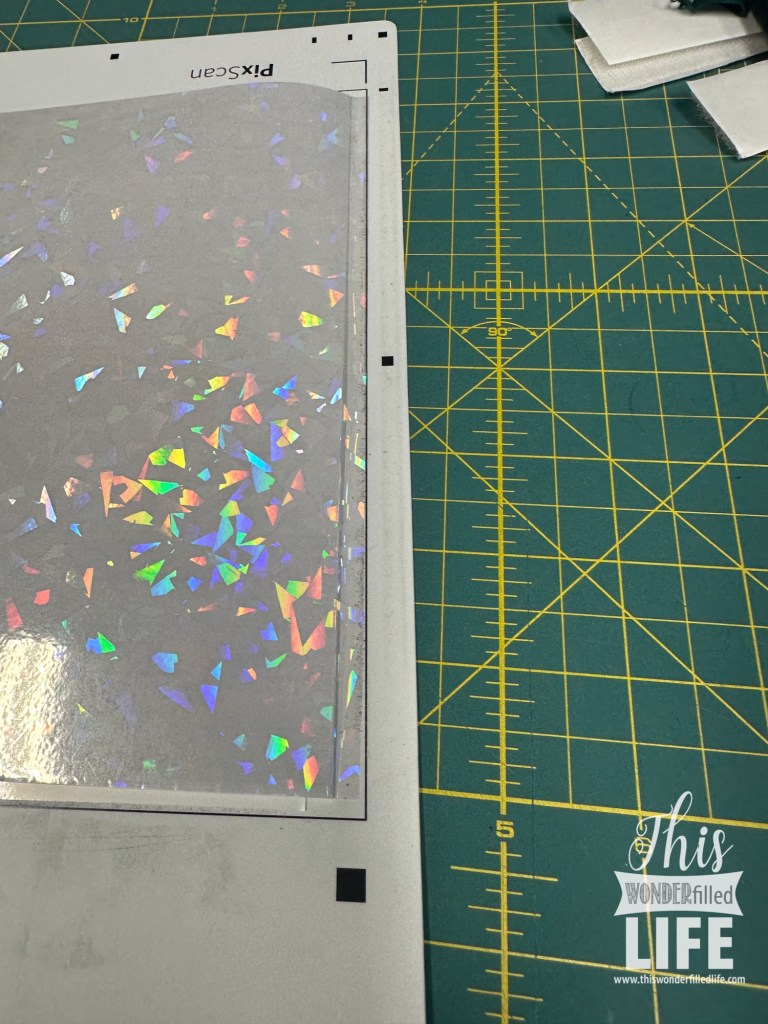
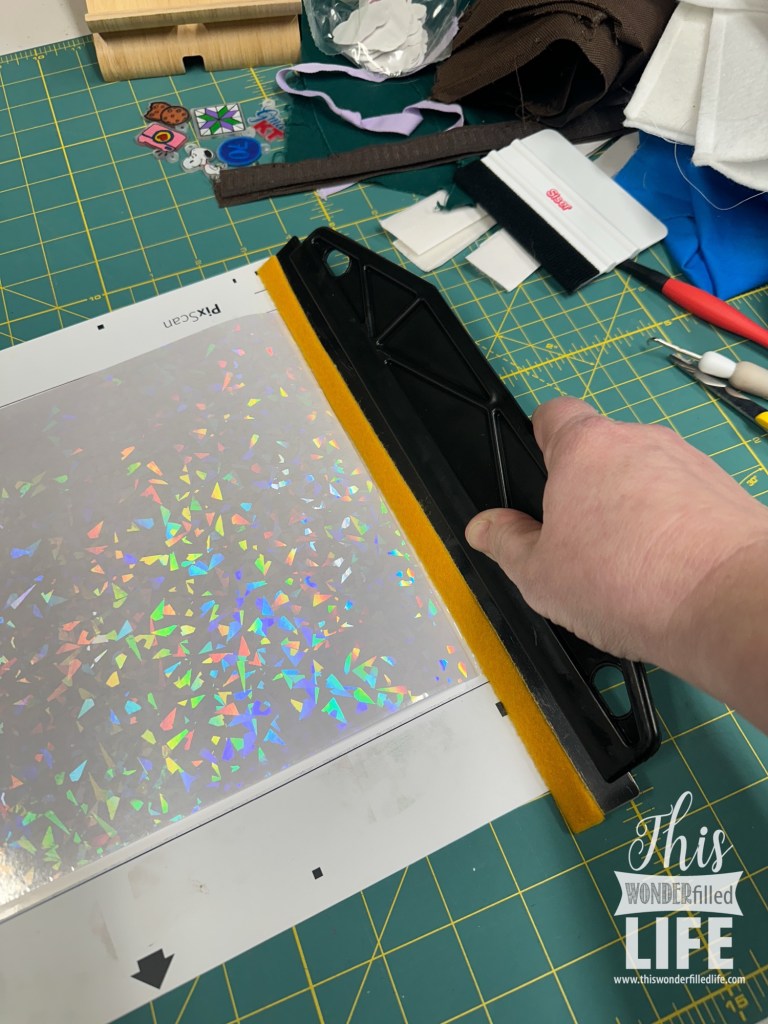
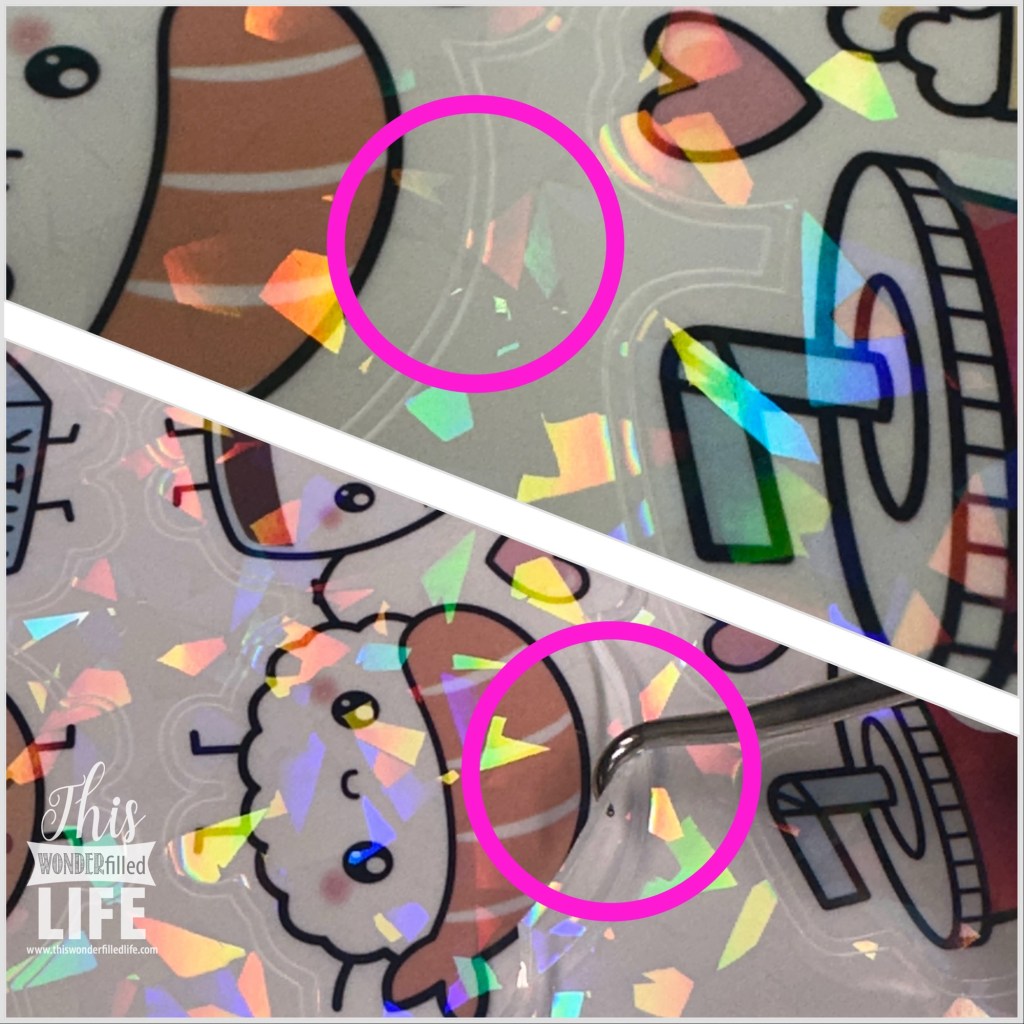
After you’ve uploaded and imported your photo and you are sure you are good to go it’s time to add your holographic vinyl. This sticker paper I printed on is a waterproof vinyl paper but adding a laminate on top just makes it extra protected and extra pretty and sparkly!! BUT adding the laminate sheets has proved to be the hardest part of this process. I started making these stickers in fall of 2023 for P’s “Under the Sea, Mermaid Tea” birthday party. I wasted so…much…laminate…trying to apply the sheets on the printed stickers. First, I was still using the print and cut feature, which required me to cut the corners out of the laminate sheet so the registration marks could be read. This often meant that the laminate would shear off, bubble up and just plain get wonky. I’d say out of sheet of 10 stickers maybe half came out decent because of the laminate sheets having bubbles or creases. And this held true through my sticker making days of Christmas 2023, and our venture into the school’s Entrepreneur fair this past holiday season (2024). BUT I found a solution, and it works. I have had ZERO issues since I started using this paint splatter guard from the Dollar Tree and some adhesive felt. First I’d like to say I had tried several different ways to smooth the laminate to the page, from credit card edges, a felt edged covered hand applicator tool (it was too small at just a few inches long) and I even made a felt sleeve for one of my quilting rulers to help apply and smooth the laminate as I laid it down and it just didn’t work. I think because the quilt ruler did not have a sharp edge, but a square edge there was simply more room for error. What ever it was this tool works and I have applied laminate to almost 7 sticker sheets and have had ZERO and I mean ZERO issues. Make sure your splatter guard is as wide as your page (9 inches or so at least) and cut a strip of adhesive backed felt about an inch wide and apply it to the metal edge of the guard, wrapping around both side. This helps the guard to move along the laminate smoothly while not scratching or leaving any marks in your vinyl.

Take your laminate sheet and place it shiny side down, and score a line across the page about 1/4” from the top. Then carefully peel back that 1/4” of backing paper, exposing the sticky side of the laminate.

Carefully line up your laminate on your Pixscan mat and printed graphics. Make sure that everything you need to be covered is! Sometimes these laminate sheets can be slightly more narrow than your printed sheet.
Next take your felt covered splatter guard and firmly hold it on the section you’ve already stuck to your mat. Gently but firmly and evenly push the splatter guard down your page as you gently pull the back off the laminate. Ideally once you get over the tiny ledge the sticker paper makes under the laminate you won’t need to pull any of the backing off. It will just naturally “peel” itself from the laminate sheet as you push the guard down.
When I tell you that this is one of the most satisfying things in my crafting world it’s not a joke. The amount of headaches over wasted laminate and sticker sheets and time and money…and to have this figured out…*happy sigh*
Now you’re just about ready to cut these cuties out. Go back to Design Studio and open the file that you printed from, the one with the double red lines around each of the images. Select all and copy the outlines (I actually just copy everything) and paste it into the Pixscan project you are currently working on.
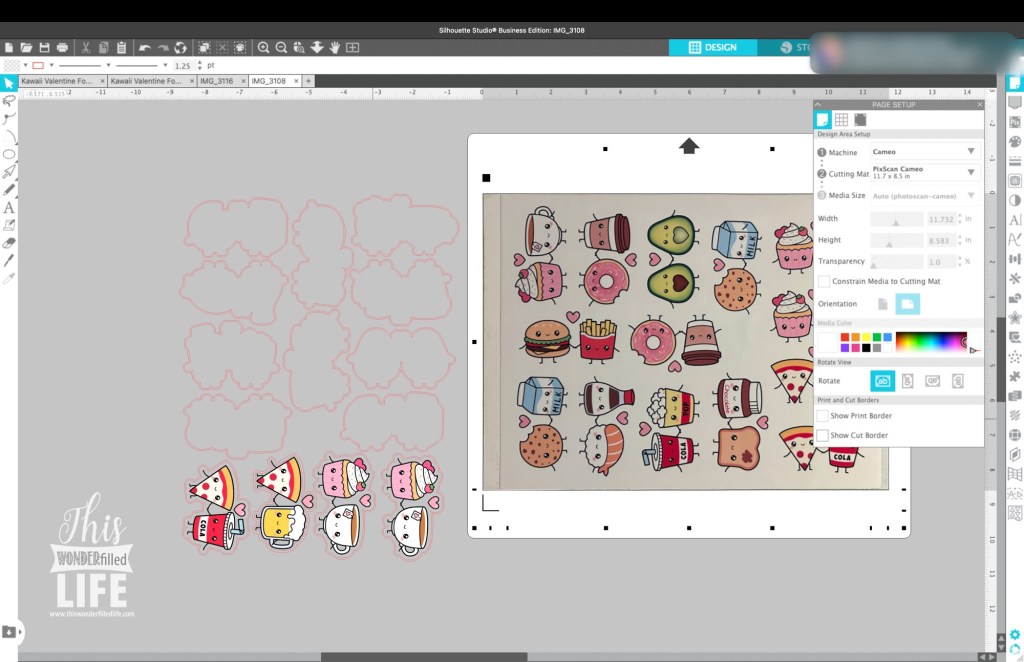
I like to move everything all together, and nudge and rotate the out lines as one large group. I found that most of them lined up pretty well as a group but I also would ungroup and move them individually as needed. The main thing is to keep the outlines for each graphic (the inside and outside lines) grouped together.
Once you’ve got your outlines where you want them it’s time to cut! Click on “send” in the upper right corner and select all the inside lines. Double check that you have indeed selected the INSIDE cut lines, and then go to your settings and choose the following:
- Material: Sticker Paper (doesn’t matter what kind actually because we’re going to change the settings.
- Action: Cut
- Tool: AutoBlade
- Blade Depth: 3
- Force: 20
- Passes: 3
- Speed: 4
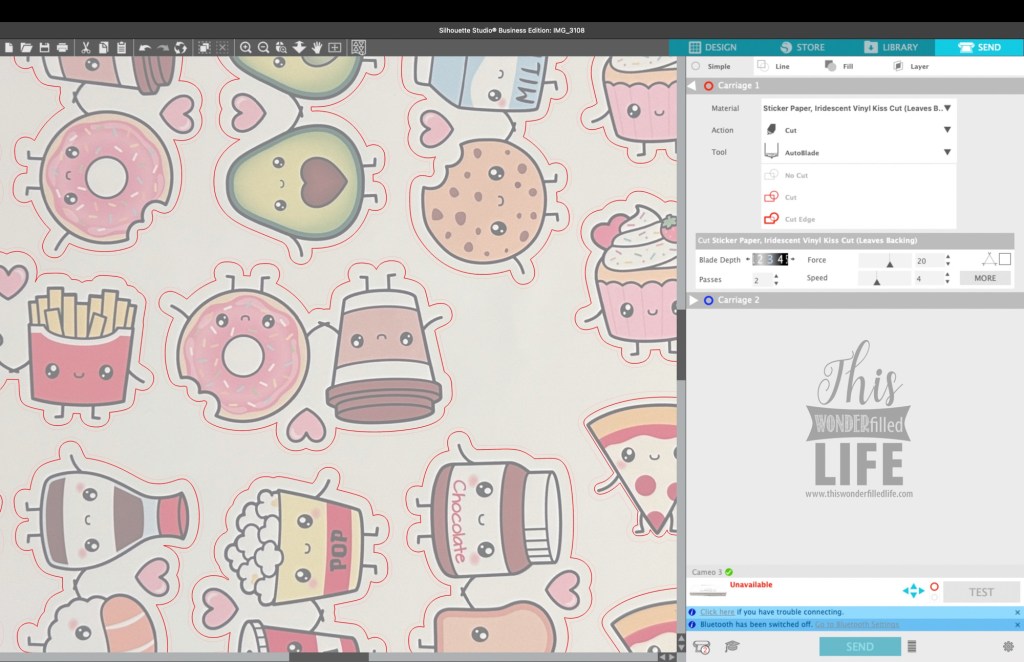
These settings will cut through all the layers except for the paper backing, also known as a “kiss-cut”. Once you have “kiss-cut” your stickers do NOT remove the mat (thought it’s okay if you need too, that’s the beauty of using the registration marks on the Pixscan mat.) Keep it in place, deselect the inside lines or choose, “No Cut”. Then select the outside lines and follow the below settings to cut all the way through all the layers of laminate, sticker paper and backing paper.
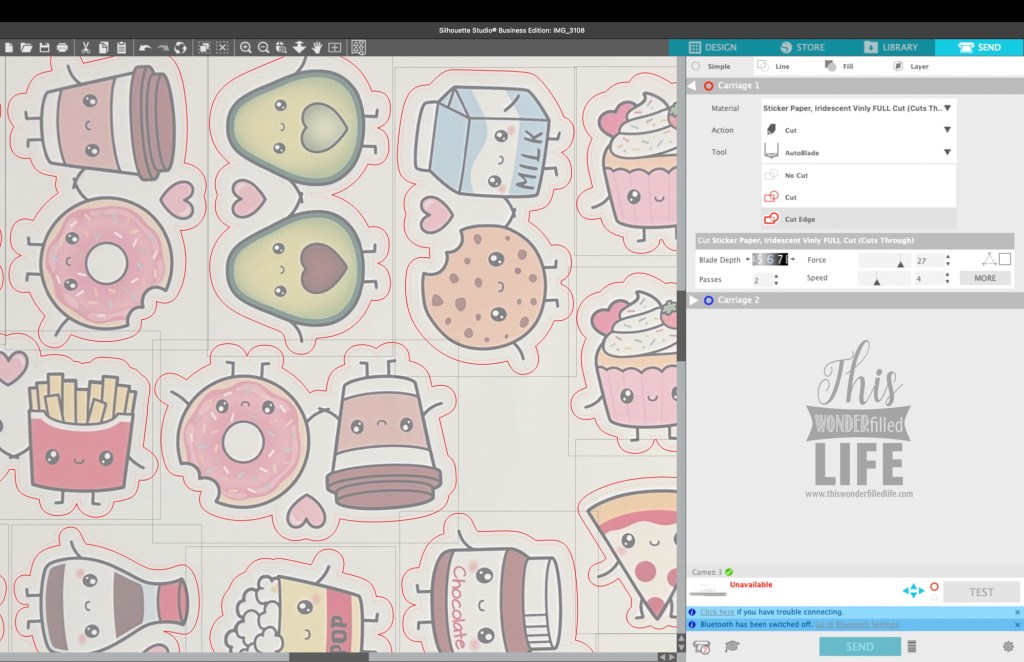
- Material: Sticker Paper (doesn’t matter what kind actually because we’re going to change the settings.
- Action: Cut
- Tool: AutoBlade
- Blade Depth: 6
- Force: 27
- Passes: 2
- Speed: 4
If you’re using the same exact papers and laminate as me then these settings should work like a charm and what you pull off your machine after these two cuts will be these gorgeous stickers with a small area around each graphic to weed out.
With our outlined weeded away we can peel the rest of the page away.
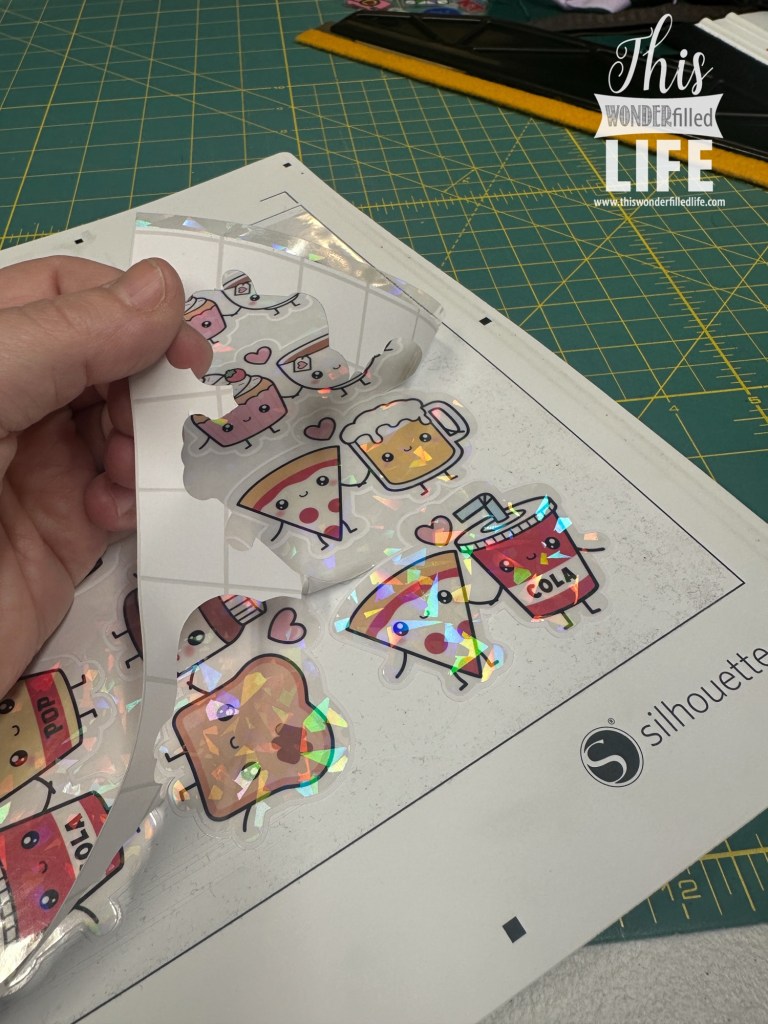

That’s it! You’re done, and now you have the EASIEST sticker ever to peel and use. I will never NOT make waterproof stickers this way moving forward.
Super cute right? Check back soon to see how we incorporated these to be our 2025 Valentines!
Until next time,
WonderJo


Leave a comment